This write up will encompass a few different component removal procedures.
Prior to any procedure I will not show you how to lift your Jeep, properly place jack stands to support the Jeep or how to remove your wheels/tires. If you cannot perform this simple task, you should stop reading this now.
Coverage:
Removing Brake Calipers for Brake shoe replacement
Removing Axles for Seal/Bearing replacement
Draining Differential Fluid for Fluid Exchange
Removing Differential Cover for Carrier and bearing inspection
Removing Carrier/Locker for Carrier Bearing replacement (should be done by trained professional with specialty tools)
When you have your Jeep lifted and properly supported and your wheels/tires removed here are the steps to get all the way down to removing your rear carrier/locker.
Rear Brake Caliper Removal (Rear 01)

For this procedure or even if you are going to remove and replace your brake pads… I only normally remove the two 18mm bolts (Rear 02) holding the caliper to the axle bracket.

Using an 18mm wrench or socket remove the 2 bolts (Rear 03)

Set the bolts aside you will need them for reassembly
Using a small bungy cord or equivalent to hold the caliper up and out of the way (Rear 04) so no undue stress is caused to the brake line.

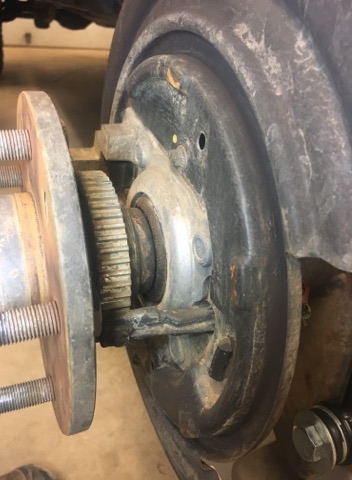
Once the caliper is removed the brake rotor just slides off, remove it and set it aside.
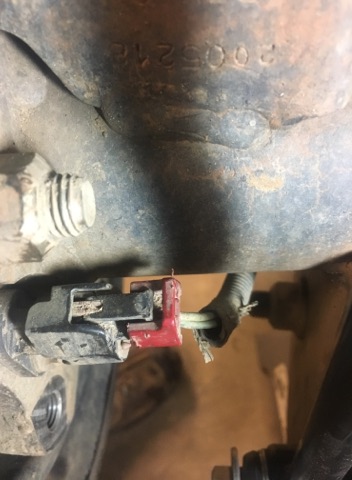
The wheel speed Sensor will need to be removed next. First you need to remove the electrical connector on the wheel speed sensor, the red tab ( must be pulled out and then depress the black tab and pull the connector of the wheel speed sensor. Using an 8mm wrench or socket remove the screw holding the sensor to the axle bracket (Rear 08 and Rear 09).


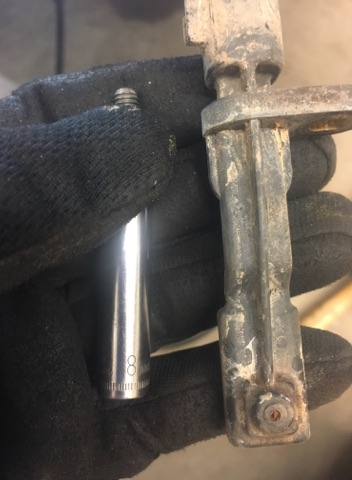
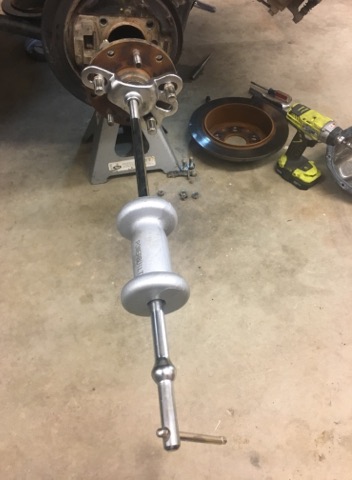
Once the sensor is removed, you can remove the four (4) 18mm nuts on the back of the retainer plate which secures the axle shaft in the axle tube (Rear 010 and Rear 011). Once the axle retainers have been removed from the axle housing you will need to attach a Slide Hammer (pic Rear 012) to the wheel studs using the lug nuts. A few quick slides with the hammer and the axle should be dislodged from its seated position (Rear 014)


All the procedures to this point should be accomplished on both sides of the Jeep prior to moving to the next step.
Next step is to drain the rear differential housing of fluid.
To drain the fluid; place a drain pan under the differential and use a 3″ 3/8″ extension and ratchet to remove the drain plug located at the bottom of the passenger side of the differential housing (not pictured).
Once the fluid is drained replace the drain plug and remove the ten (10) 13mm bolts (Rear 015 and Rear 016) hold the cover to the housing. You can use a small flat screwdriver to pry the cover off or rubber mallet to loosen the cover which is normally held in place by silicone sealant. Once the cover is removed clean the remaining sealant from the cover and the housing for a clean surface for later reassembly.


The next and final step is to remove the Carrier/Locker from the axle housing (Rear 017).

If this is the first time you have removed the carrier caps, they need to be marked for reassmbly, the carrier caps are machined with the axle and should ONLY be reassembled in the direction and side the are removed from. By placing a mark on the housing and on the cap you can easily reassemble the caps to the correct side and direction (Rear 018 and Rear 019). Using a 19mm socket and Ratchet remove the four (4) carrier bearing bolts and set the caps aside. (Torque Specs 80 ft pounds)
At this point there is NOTHING holding your carrier in but pressure from the bearings and shims.


NOTE:
Be aware that the shims on each side of the carrier NEED to be placed back on the same side they are removed from. Take care when removing the carrier not to mix the shims from one side to another, this will affect your backlash of the gears and possible cause a catastrophic failure.
You should be able to grab the carrier and pull and remove it from the housing. (Rear 021)


At this point you if you have the tools and expertise required to remove the carrier bearings you can proceed with that or take the carrier and new bearings to a certified professional for replacement. This applies to the axles shaft seal and bearing components.
Otherwise.. Reassembly is simply the reverse of what you just accomplished!
Don’t forget to fill the differential with the correct 80/90w gear oil before driving it.
Tools:
Jack
Jack stands
Small Screw Driver or prybar
Small hammer
Rubber Mallet
Slide hammer
8mm Wrench or Socket/Ratchet
13mm Wrench or Socket/Ratchet
18mm Wrench or Socket/Ratchet
19mm Wrench or Socket/Ratchet
3″ 3/8″ Socket Extension
Torque Wrench capable of 100ft lbs
Torque Wrench capable of 200 in lbs
Silicone sealant for differential cover gasket
Two (2) Small Bungy cords
Letter punch or someway to mark the bearing caps (if not marked)
80/90w gear oil (D44 uses about 2 bottles)
Torque Specifications:
Rear Wheel Speed Sensors Mounting bolt – 106-124 Inch lbs
Rear Brake Caliper adapter bolts – 55 ft lbs
Fill hole Plug – 25 ft lbs
Differential Cover bolts – 30 ft lbs
Bearing Cap Bolts – 80 ft lbs
Axle retainer nuts – 45 ft lbs